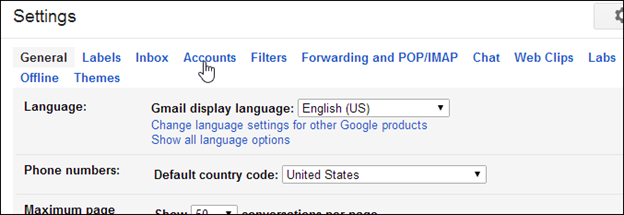
To set up Mail Fetcher to check email from another account, click the “Settings” gear button and select “Settings” from the drop-down menu. Click the “Accounts” link at the top of the “Settings” screen.
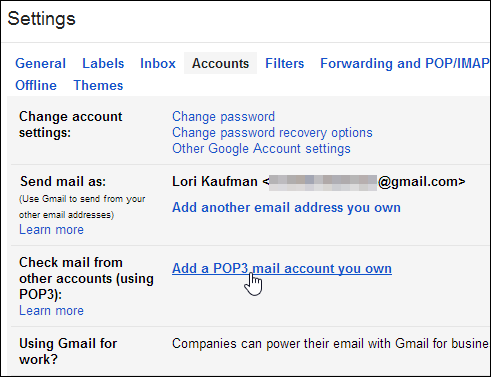
In the “Check mail from other accounts (using POP3)” section, click the “Add a POP3 mail account you own” link.
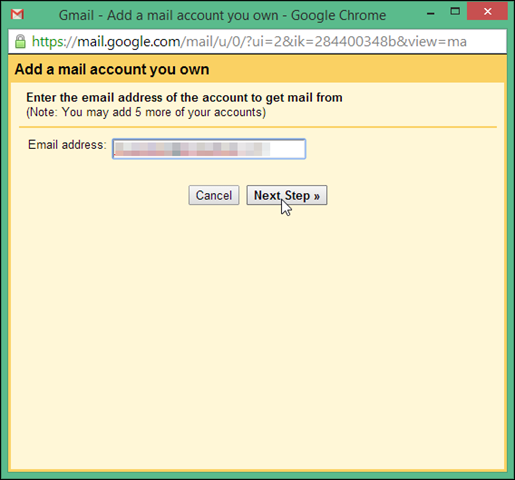
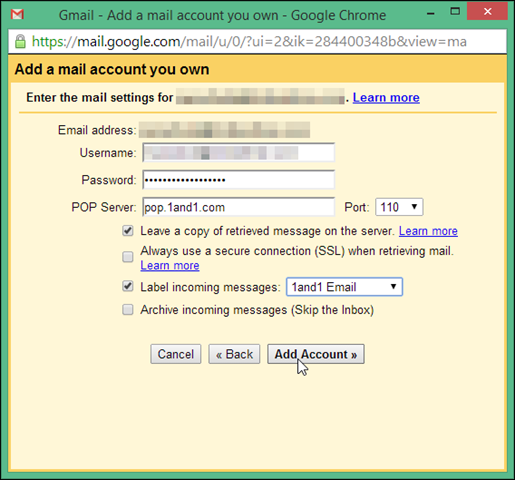
The “Add a mail account you own” dialog box displays. Enter the email address for which you want to receive emails in your Gmail account in the “Email address” edit box. Click “Next step.”
Enter the settings for your other email account, such as the “Username,” “Password,” “POP Server,” and the “Port.”
If you still want to be able to check email for your other account in other email clients on other computers, select the “Leave a copy of retrieved message on the server” check box.
You can also choose to label incoming messages for the other account with a special label, so you can tell which messages they are in your Gmail inbox. To do this, select the “Label incoming messages” check box and select a label from the drop-down list. There is an option in the list to create a new label if you don’t currently have one that is appropriate.
If you don’t want the messages from your other account in the inbox with your Gmail messages, you can select the “Archive incoming messages (Skip the inbox)” check box to bypass the inbox and archive the messages immediately.
NOTE: You can also set up a filter to move the messages to a label. See Lesson 4 more information.
Click “Add Account.”
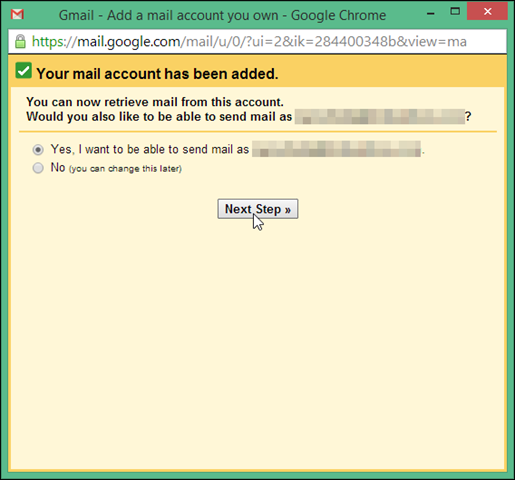
Now, you have the choice of setting up Gmail to send mail as the other email address. To do this, select the “Yes, I want to be able to send mail as” option and click “Next Step.”
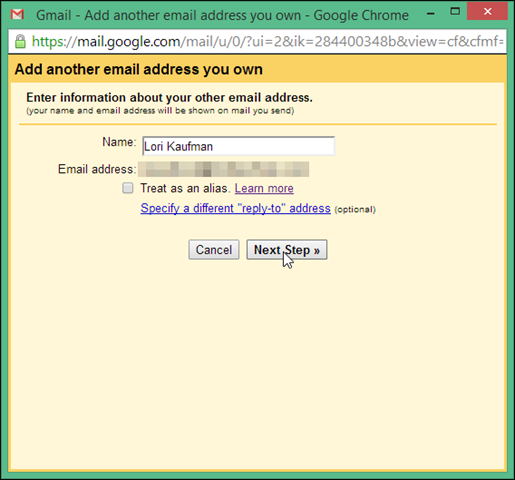
Enter information about your other email address. By default, the “Treat as an alias” check box is selected, however, you may want to turn it off.
When you use an alias, messages you send to a “Send mail as” address appear as unread in your inbox, as well as appearing in your “Sent Mail.” Also, when you receive an email from a “Send mail as” address and you click “Reply” in the message, the “To” field is populated with your primary Gmail address. To avoid these problems, uncheck the “Treat as an alias” box, then click “Next Step.”
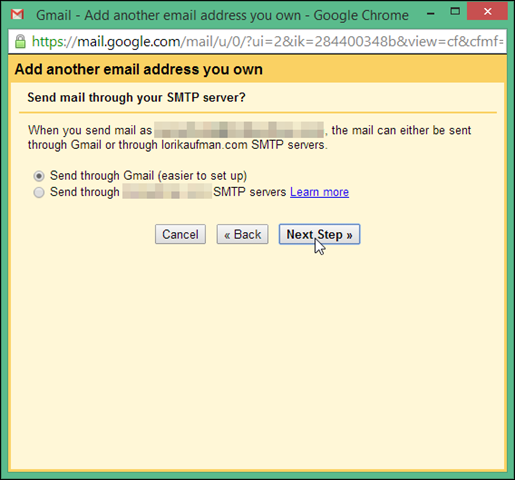
If you’re going to send email as your other address, you must tell Gmail whether you want to use Gmail’s servers or the SMTP servers for your other provider. It’s easier to setup “Send mail as” using Gmail’s servers, so we recommend you do that. Select the “Send through Gmail” option and click “Next Step.”
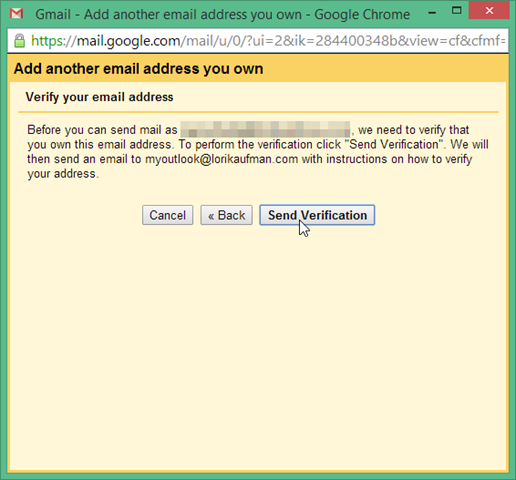
Now you need to verify that you own the other email address you’re adding in Gmail. Click “Send Verification” to have Gmail send an email to your other address.
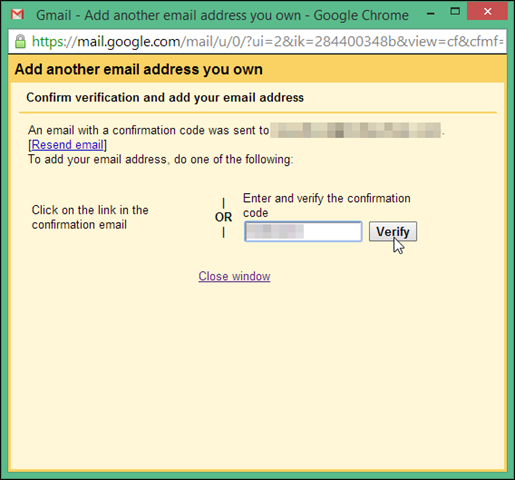
The confirmation email contains a link you can use to verify your address, or you can enter the confirmation code from the email in the “Enter and verify the confirmation code” edit box and click “Verify.”
The “Add another email address you own” dialog box will close automatically. If you click the link in the confirmation email, you may have to close the dialog box manually by clicking the “Close window” link.
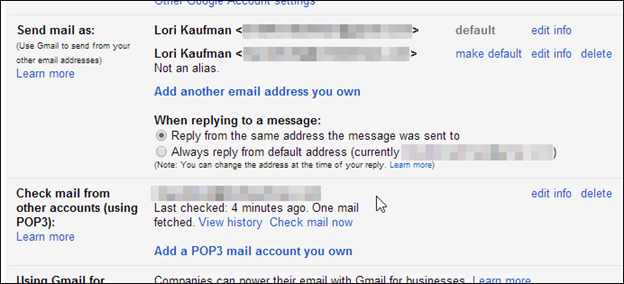
Your other email address is added to the “Check mail from other accounts (using POP3)” section on the “Settings” screen. It’s also added to the “Send mail as” section, if you chose to be able to send mail from that address in Gmail. In the “Send mail as” section, under “When replying to a message,” you can choose to “Reply from the same address was sent to” or to “Always reply from the default address,” which is your current Gmail account. Note that you can always change the “From” address when you compose your new message or reply.
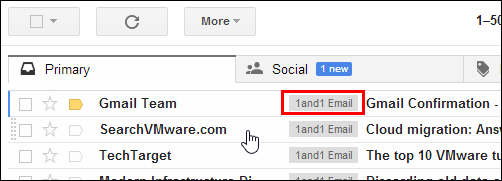
Email messages received for your other email account display in your inbox (unless you automatically archived them or moved them to a label) with whatever label you assigned to them.